Creating compartments
With the Create Compartments form (model > Fluids) you can define the compartments to be created within the fluid zones you selected on the Activate Fluid Zones form. Within each fluid compartment, fluids are in hydrostatic equilibrium. The fluid levels of compartments will be defined later on the Fluid Levels form. The compartment definition will be based on the intersections of the faults (selected on the Assign Boundaries form) with the fluid zones (selected on the Activate Fluid Zones form).
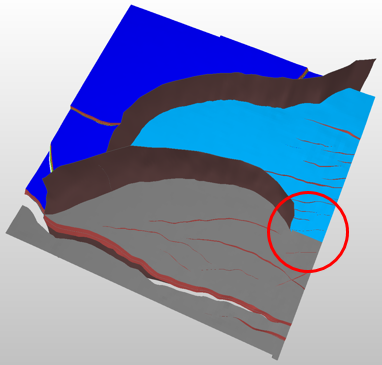
A fluid boundary is extended in order to form closed compartments. click to enlarge
On the Create Compartments form, you can select the faults which serve as compartment boundaries. It is therefore recommended that prior to creating compartments, you have a notion of the sealing behavior of the faults in your model. Based on the selection you make on the form, the compartments are constructed. Note that faults do not always form closed compartments, and in that case the corresponding fluid boundaries are extended laterally.
Additionally, you can use artificial boundaries to define compartments, for example when a 'vertical' fluid compartment boundary cannot be represented by a fault. See Using artificial boundaries for explanations on how artificial boundaries can be created and used.
The table on the form lists all fluid zone-surface combinations (the surface being either a fault or artificial boundary) that you assigned to the fluid model and which you can select to create separate compartments on either side of the surface for that fluid zone:
- If you think that a fault/artificial boundary is sealing, check the box of the fluid zone(s) it intersects: separate compartments will be created at either side of the fault/artificial boundary for that fluid zone(s). For fluid zones that are only partly intersected by a fault, see Vertical elongation of partly intersecting faults for more info.
- If you think that a fault/artificial boundary is non-sealing, leave the box empty: no separate compartments will be created at each side of the fault/artificial boundary and the fluid zone will be in full communication across the fault/artificial boundary.
To create compartments
- Open the Create Compartments form (model > Fluids).
- Specify the fluid model of interest. Upon selection of the fluid model, the Fluid Zone column lists all the active fluid zones you defined in the previous step of the workflow and the Surface column lists the intersecting faults and/or artificial boundaries you selected on the Assign Boundaries form.
- Select the zone-surface combination for which you want the surface in the Surface column to act as a compartment boundary for that fluid zone. By default all fluid zones listed in the table are selected. Uncheck a checkbox to deselect any zone-surface combination that you do not want to include in the compartments creation. For all zone-surface combinations that you leave blank (i.e. for which you do not check the box) the surface will be ignored and the compartment will not be divided at the surface location.
- Click OK to create the compartments and move to the Assign Logs form, or Apply to keep the Create Compartments form open.
Compartments naming convention
When a fluid compartment is generated it is given a name in the following convention: Name (Segment #)
Name is specified and can be edited in the Name column of the 'Active Fluid Zones' table on the Activate Fluid Zones form.
Segment # refers to the area bounded by the fault/artificial boundary.
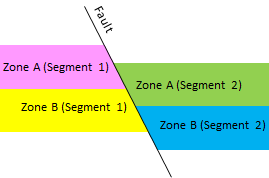
Example showing the naming convention of compartments. click to enlarge
Fluid compartments are formed as a result of fluid zones being sliced by segments. For example, Zone A and Zone B are cut by a fault and then you will find four compartments named as:
- Zone A (Segment 1)
- Zone B (Segment 1)
- Zone A (Segment 2)
- Zone B (Segment 2)
Compartments in the JewelExplorer
After the compartments have been created, the Fluid Compartments item is created in the JewelExplorer under your fluid model (Fluid Models > Your Fluid Model > Fluid Compartments). Within this item you can find each compartment that was generated for the fluid model. These compartments can be visualized in the 3D View by checking the box for each compartment of interest.
You cannot delete these compartments directly from the JewelExplorer, but when you rerun Create Compartments, the existing compartments will be overwritten.
In exceptional situations, you might want to use a partly intersecting fault as a complete boundary and separate a fluid zone into different compartments. On the Create Compartments form, you will find zone-fault combinations for a fault which only partially cuts through a fluid zone. In those cases, the fault will be extended along the fault plane not physically in the model, but artificially for compartment creation purposes (see image below).
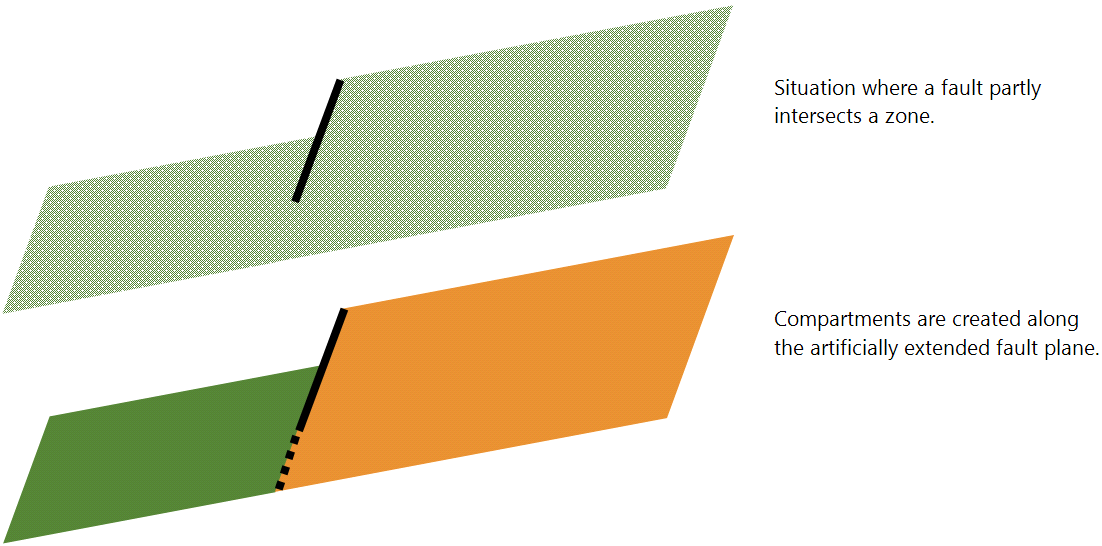
Faults that only partly intersect a zone (upper image, side view) can be used to separate that zone into different compartments. In those situations, the fault will be artificially extended along the fault plane (lower image) click to enlarge
Depending on your model, you may need to split a fluid zone using an artificial boundary because of lack of a structural feature in your data, such as the scenario depicted in the image below.
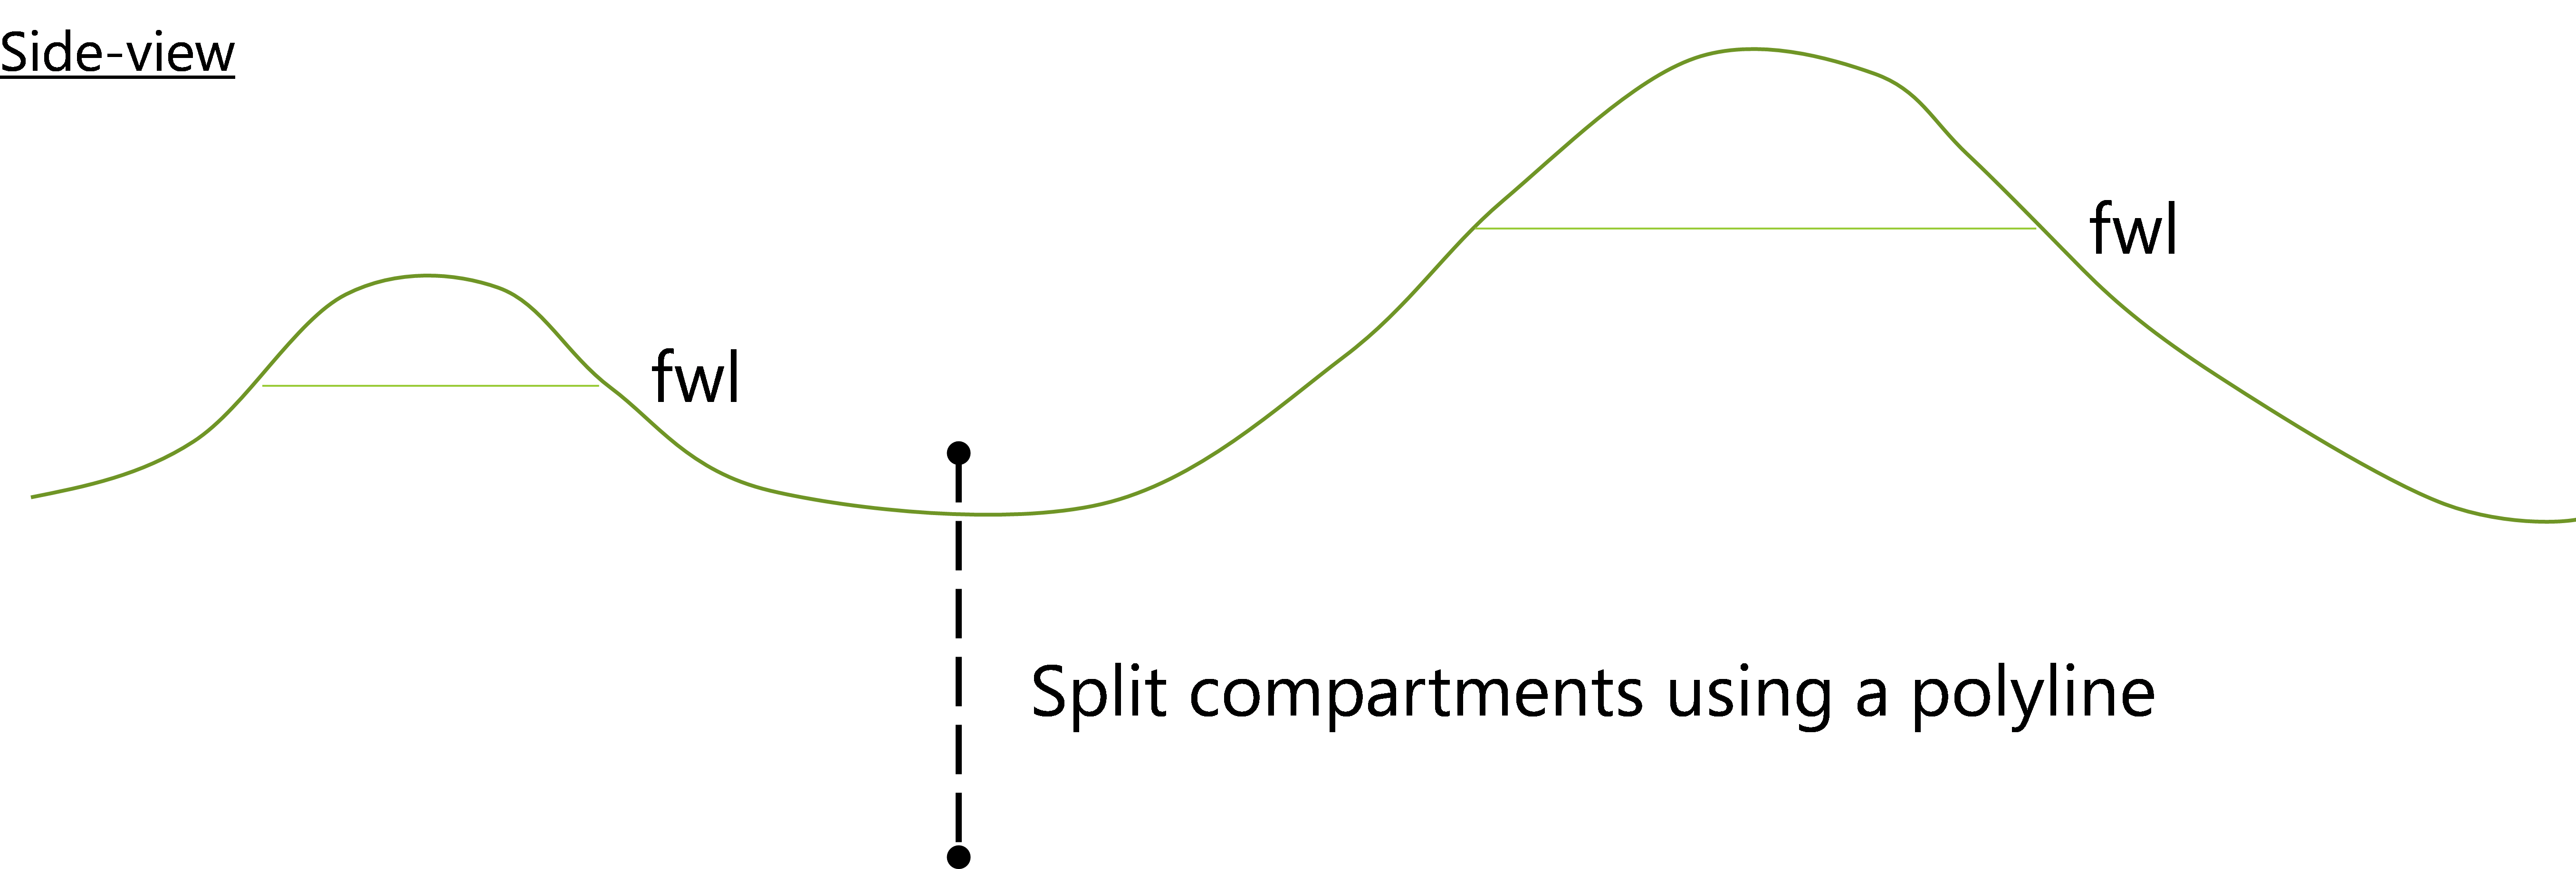
In the above example, two fluid compartments are needed. There is no structural feature (such as a fault) present to act as compartment boundary. A user-defined boundary can be created using a polyline click to enlarge
A common case is a reservoir consisting of two structural highs with different free water levels and pressure communication through the water leg. To cater to such scenario, the fluid model includes functionality to add a user-defined boundary to split the reservoir into separate fluid compartments. This functionality is found in the Select Additional Fluid Boundaries section of the Assign Boundaries form.
 Property Inspector .
The image below (view from the side) shows how a simple zone may be split using an artificial boundary.
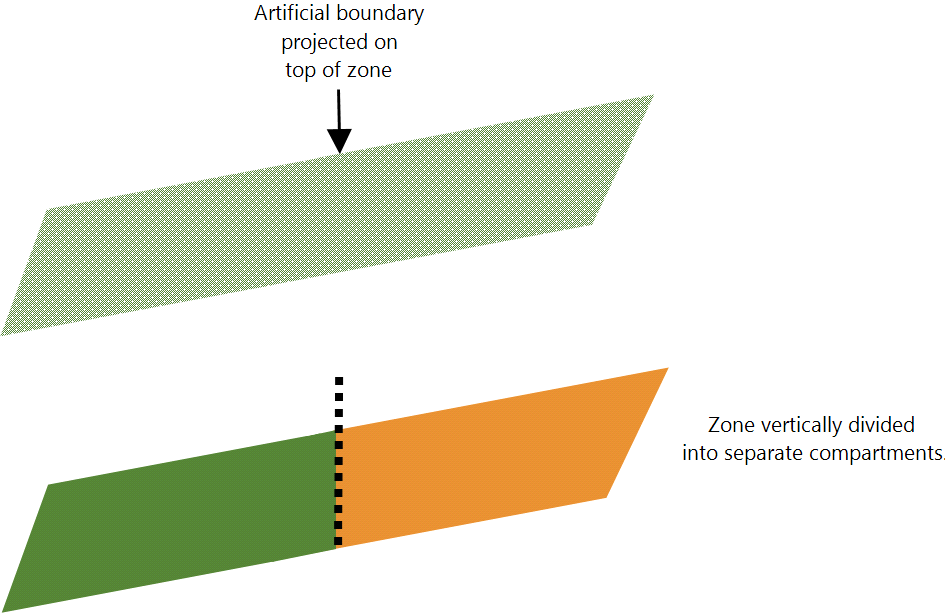
An artificial boundary is projected on the top of the zone and vertically divides the zone into two compartments. click to enlarge
To achieve the creation of compartments, the artificial boundaries are extended until a fault or model boundary is reached. Although the actual polyline set may not stretch across the entire extent of the fluid zone, the result is that these extensions create compartments which are conform to the other boundaries of the fluid zone, such as faults and boundaries of neighboring fluid zones.
Other rules that control how artificial boundaries can be extended can be applied depending on the scenario you are modeling. The following is a list of how the application handles artificial boundary extension:
- Artificial boundary extension is ceased when it intersects an artificial boundary.
- Artificial boundary extension is ceased when it intersects another artificial boundary extension.
- Artificial boundary extension is ceased when it intersects a fault extension.
- Fault extension is ceased when it intersects an artificial boundary.
For information on creating a polyline set to use as an artificial boundary, see Add Polyline Set in Creating surfaces and Graphically editing polylines.
Compartments can be merged or unmerged in the JewelExplorer or in the 3D View via the right-click context menu of one of the compartments of interest.
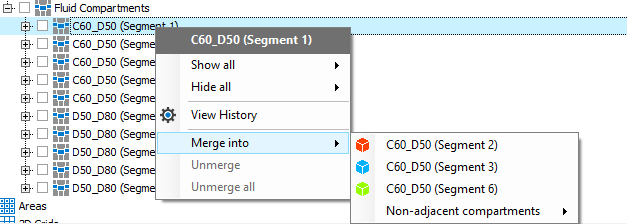
Use the context menu to merge compartments click to enlarge
To modify the compartments in your 3D View
- In the JewelExplorer ensure that the fluid model and its compartments are the only active (checked) items.
- After reviewing the compartments in the 3D View, right-click the compartment of interest and select one of the options from the context menu:
Merge into Allows you to merge adjacent compartments. The new compartment will take the name of the compartment selected from the list.
Non adjacent compartments Allows you to merge compartments which are not adjacent to the selected compartment.
Unmerge Allows you to unmerge compartments. Unmerging is handled in reverting sequence of the merge actions, and is done one by one.
Unmerge all For compartments that have been merged into by many other compartments, this option will unmerge all of the constituent compartments.
To merge multiple compartments
You can also merge three or more compartments in a single action. To do this:
- In the Jewel Explorer, multiselect all the compartments you want to merge. To multiselect, press and hold the Ctrl key and click on the compartments of interest.
- Right-click one of the highlighted compartments, hover over the Merge into option and select the compartment of interest from the list. The compartments are merged and take the name of the compartment that was selected from the Merge into list.